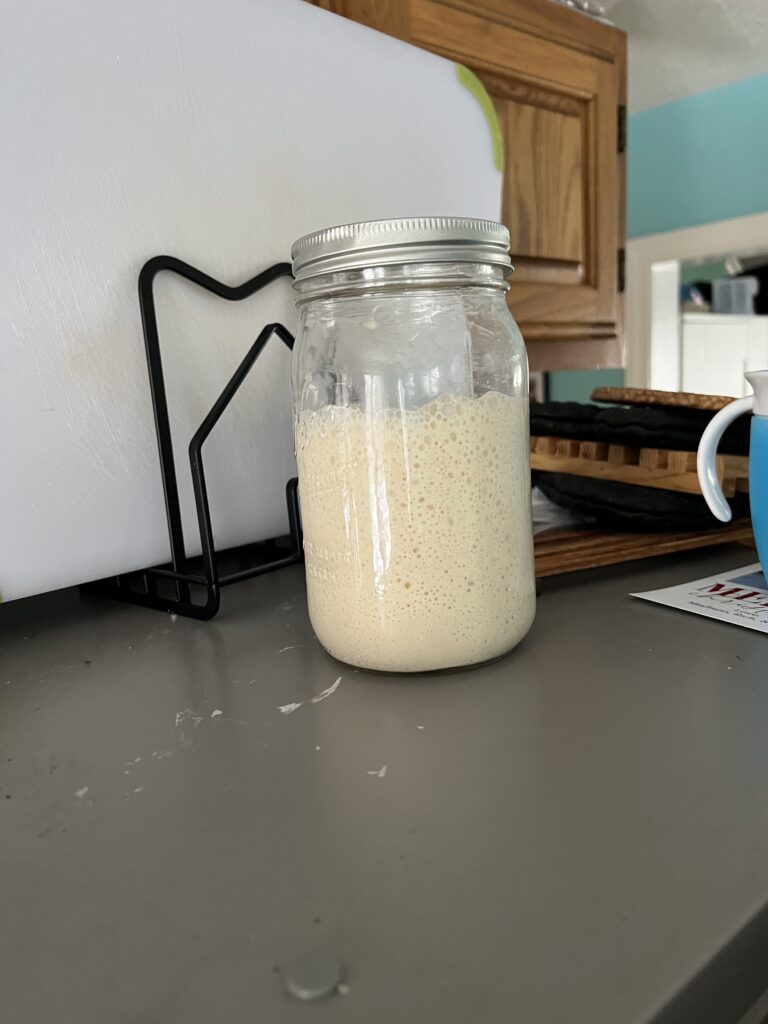
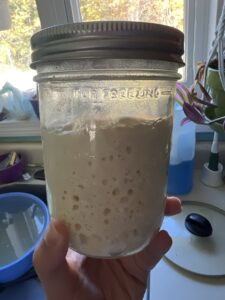
This starter is past peak and already fallen a good bit.
100% Hydration Starter
This is what most people mean when they say Sourdough Starter.
A Wet Starter, or a batter starter, is ideal for people who really want to emphasize the sour part of sourdough. This culture best nurtures the acid production that happens in a starter, which is why so many people have vinegary or alcoholic notes (smells) when their starter is “hungry”.
And that’s exactly what I smelled when I was actively keeping a sourdough starter when I first got into this whole game. When my starter was new, it smelled “like fresh bread” or “yogurt” or sometimes a mix of “fresh bread and beer”… In a few weeks, it smelled like vinegar (let me emphasize that nothing was wrong with it. Vinegar smell is okay) and the only flavor to my bread was sour. Some people love this and some don’t.
NOW!
If you don’t want to make a starter and you have a friend who can give you some of theirs, cool! Do that and skip down to Daily Feeding!
Otherwise… Grab your ish! We’re going! (Or go on over to the stiff starter section cause this is not you and you don’t want to make a wet starter after all. Again? Not your dad.)
Equipment!
Flour – any kind you like. The only “Have To” you need to watch for is for it to say “Unbleached” on the bag. Why? Because bleach is used to kill germs, right? And the goal here is to make a whole colony of germs. There have been people who have made bread with bleached flour. So if you need to try – do it! It’s just much less likely to work.
Water – You can use bottled, filtered, reverse osmosis, well, or city. People say you can’t use city water, or some well water, because the city tends to add certain chemicals to make it safe for drinking, and those chemicals also kill our little bacteria. You can get around this by putting your water in an open container and letting it sit out overnight. Those chemicals will evaporate or dissipate or whatever chemicals do and your water will be fine.
JarWith A Lid – or container or whatever. Two would be even more helpful. It’s recommended to use a glass jar or a special crock because starter is acidic and can slowly begin to corrode your metal or plastic containers. Use what you need to use. It does not Have to be glass or straight sided. Those things aren’t necessary, they just make it easier. Grab an extra bowl, an old (but clean) jelly jar, some kind of cup that you can cover. Just has to be big enough to hold at least twice what you put inside. For your lid, you’re going to want the lid to be engaged on the jar (so it doesn’t get knocked off) but Not screwed down tight. If you have nothing with a lid, use a paper towel/napkin and a rubber band or hair tie to cover it. We want to make sure bugs can’t crawl inside the jar, because they love starter, but we also want to make sure that air can flow in and out so no pressure builds up inside and explodes your jar.
Stirrer – anything, friend. Using a metal spoon is not going to kill your starter or corrode your spoon. It spends so little time in contact with it all and then it gets washed.
Measuring Spoons/Cups/Kitchen Scale – whatever you have or prefer to use. I got a $10 kitchen scale a few years ago and I enjoy that method, but it isn’t Necessary. I’m gonna break things down so people can use whatever tools they already have, or can buy the cheap version at the dollar store.
Let's Make A Starter.
Day 1
– Nothing interesting to see or smell.
We’re gonna measure out 30 grams (g) of flour.
So you take your tablespoon (Tbsp) and put two heaping scoops of flour in a jar. That means the flour is not going to be level on the spoon, okay? You want it to come up over the edge a good deal, but you don’t want it to be a huge mountain. More like a respectable hill.
Or, if you’re using a scale, either put your jar on top of it or a small bowl and then turn it on. You’re gonna want to make sure the measurement has a little (g) on there so you know you’re in grams – there will be a button to help you switch between them. Then you just add flour until you get 30g. Side note: 30g is not a lot of flour, so don’t just dump a bunch in.
Now that that’s in our jar, it’s time for our water.
Add two regular tablespoons to your container, water takes up a different amount of space than flour. OR
Hit “tare” on your scale so that the number returns to 0 and then add 30g of water. This is also a very small amount of water. I recommend weighing your ingredients in a separate container at first, until you get the hang of pouring such a small amount of water in.
Alright, folks! Stir it all up. Make sure you get everything off the bottom. It should look like really thick pancake batter with no spots of dry flour at the bottom.
Put on the lid, just barely, or put your whatever on top and secure it with your rubber band/hair tie thing.
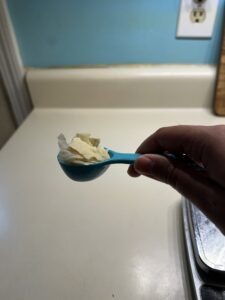
This is a heaping tablespoon... It's dried starter instead of flour, but that's the idea.
Day 2
– Maybe some bubbles? Maybe nothing.
You may stir it. You may not add more.
I mean, you can, but it’s unnecessary and would just be a waste of flour/water.
Special Note! There may be some evidence of your starter having risen and fallen. This is false hope, frand. I promise your starter is not yet okay to use. The battle between beneficial buddy type germs and aggro bad belly type germs has just begun.
Freshly Fed and full of potential!
Day 3
– Maybe your starter rose up yesterday? Maybe you only have a few small bubbles on the bottom or sides of the jar? Maybe nothing has changed. All of these things are normal.
AM – Add 30g (2 Tbsp) each of flour and water and mix it all up (don’t discard)
Make sure to heap those tablespoons in the flour, or your starter will be more runny than we’re going for.
PM – Now we’re going to take 30g of our mixture out and put it in a separate jar
Add 30g (2 Tbsp) each of flour and water to that new jar. Congratulations! You’ve just done your first 1:1:1 feeding! That means you took an equal amount of starter, water, and flour and mixed it all together. This concept will be helpful later.
THROW AWAY whatever was left in that initial jar. It does not yet count as “discard” in the sense that you can use it in a sourdough discard recipe. At this point, you may have even noticed bubbles or had your starter rise, but the good bacteria is not yet strong enough to win out over the bad bacteria in there and cooking with this might make you sick.
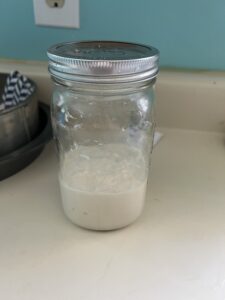
You mixed your flour and your water and now you've got... watery flour! Yay! Please note the two small bubbles in there. This is Not sign of activity already. This is because I'm an aggressive starter stirrer. The streaks on the jar are also from aggressive stirring and not from rising/falling activity.
Day 4
– In most cases you will have bubbles by now.Some only get a few and some have bubbles everywhere. It is still normal not to see any bubbles at all at this stage.As long as you don’t have any obvious signs of mold (fuzzy patches or orange/yellow/pink spots or streaks on the surface) your starter is fine.
AM – Take 30g (2 Tbsp) of your starter and put it in a jar with 30g (2 heaped Tbsp) of flour and 30g (2 Tbsp) of water and mix that all up.
Again, throw the discard away.
PM- Take 30g (2 Tbsp) of your starter and put it in a jar with 30g (2 heaped Tbsp) of flour and 30g (2 Tbsp) of water and mix that all up.
Last time we’re throwing out the discard.
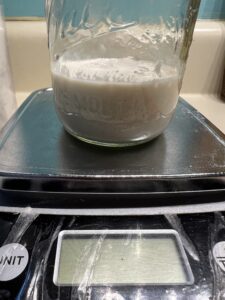
This is what you want your wet starter to look like in order to bake. The bubbles are mostly consistent in size but there are areas that are not yet filled with them. This shows that the starter will rise a little bit more if left alone, but may reach peak and then pass it while you aren't looking.
Day 5 And Onward
– By this point if you don’t have bubbles, you have a slow starter. It’s still healthy, but for some reason it’s taking it’s dang sweet time. Maybe it’s winter time and your house is cold? It’s fine! It’s fine. It’s all fine. Everything’s fine. You only need to throw it away if there are clear signs of mold.
By now, there will be a definite smell to your starter. It could be bread-like, yogurty, beer-ish, vinegary, or even a bit nail polish removery. All of those smells are perfectly normal for a sourdough starter. If you go to stir it and suddenly smell puke or rancid milk? Then you’ve got a problem.
From here on out, you can follow the same process as Day 4, but you can keep or use the discard if you like.
A sourdough starter is considered “able” to bake bread with on Day 7, or when it begins to rise and fall in a consistent manner. But this bread will probably be a little dense and subpar because the starter is still young. I’ve found that it takes about 7 weeks before a starter can reliably produce good bread. But, the bread that you bake in the meantime is a great learning experience.
You can start to get a feel for combining ingredients, how dough is going to feel, which method of kneading you prefer, how sour your dough will get in certain conditions, how to keep your dough sweet if you prefer that, etc. So it still isn’t a waste to bake during this time.
Now is a great time to look up some discard recipes! My favorites are fried starter, flatbread, or adding it to quick bread recipes for flavor and poof! Lookin at you, pancakes.
Below are some extra pictures! What a starter looks like when you missed your ideal window (it’ll still bake it might just take more time). Then what it looks like when you don’t discard and your starter explodes with activity. And, in that last picture, I have a starter that’s gone bad. It smells vile, it looks nasty, THIS is what you’re looking out for and when you need to throw it away and sanitize your jar and stirring utensil. I intentionally took a small portion of my starter and allowed it to go bad so we could have a reference for a dangerous situation. If there is even one spot or streak of pink, yellow, orange, or fuzz, we have a bad situation. Toss it all and sanitize it.
This starter is past peak and already fallen a good bit.
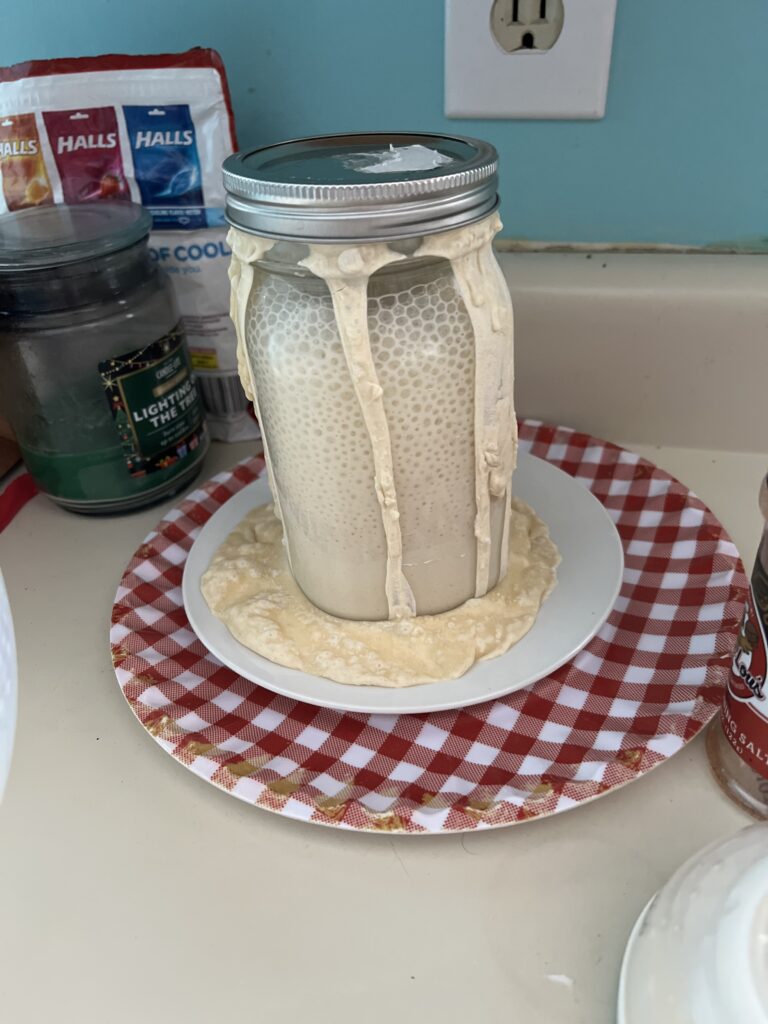
I fed this friend Way way too much. You can tell I knew because I put it on a small plate! You can tell I didn't have time to feed it when I found it and worried it would keep going, because I put that small plate on top of an even bigger plate! Wow.
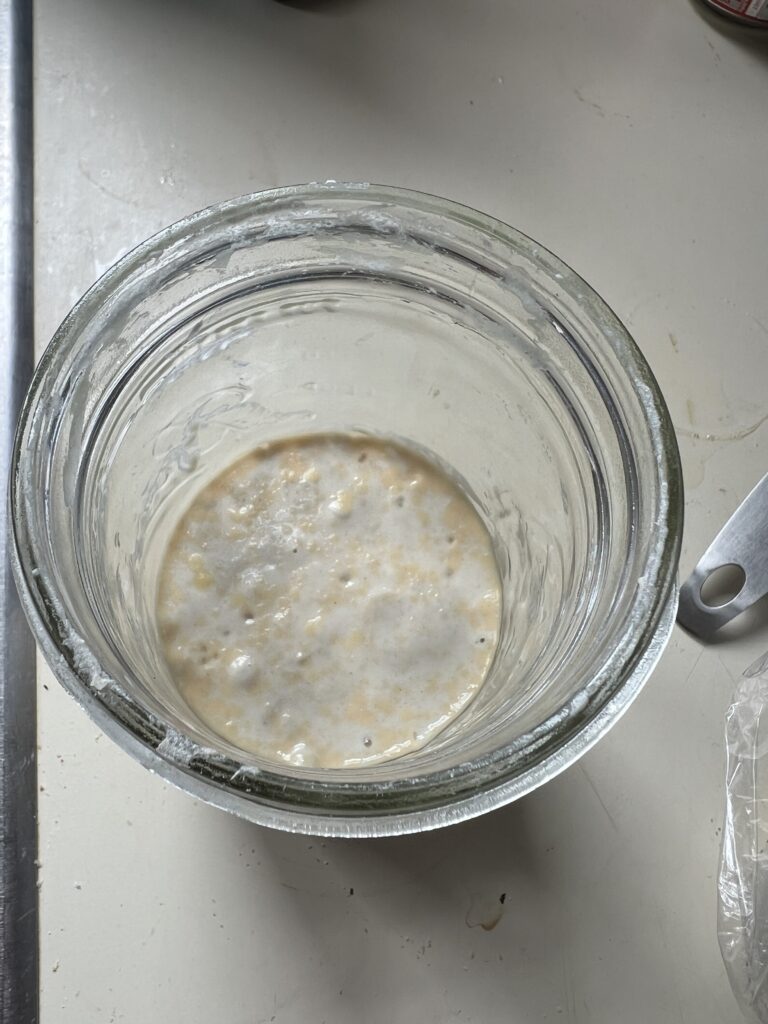
I let this sit on the counter with no feedings for two days so I could get a picture of the orange (also pink, yellow, or fuzz) that shows up when your starter dies.